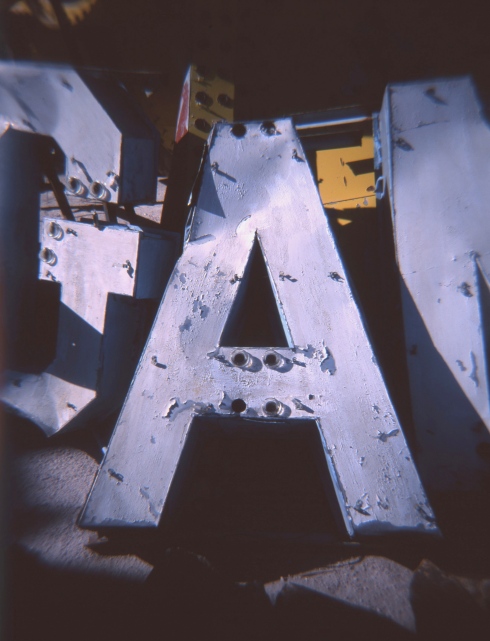
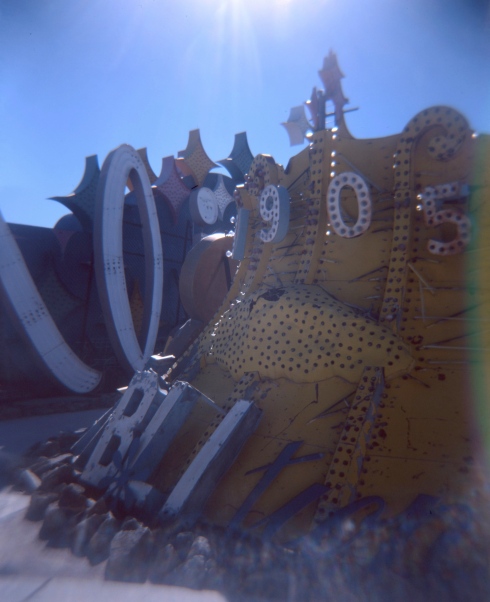
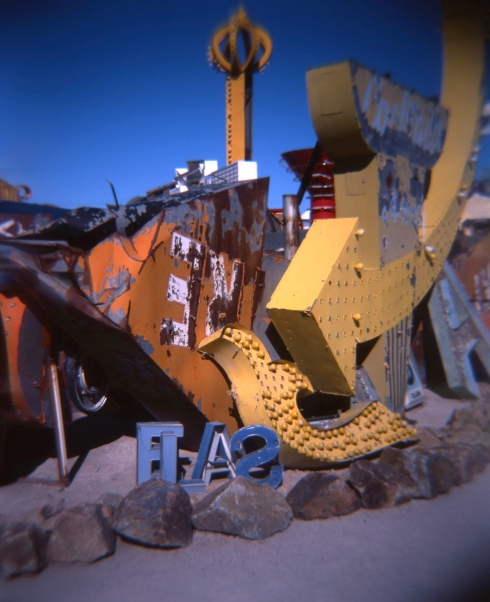
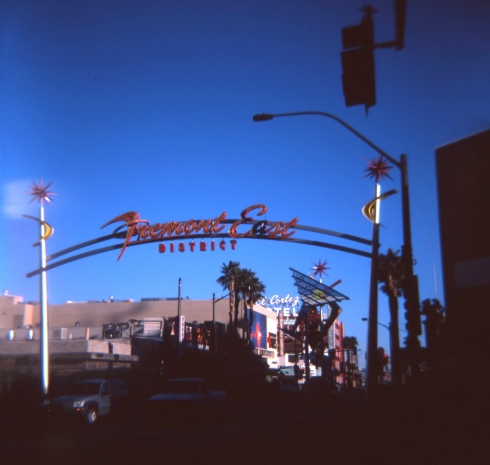
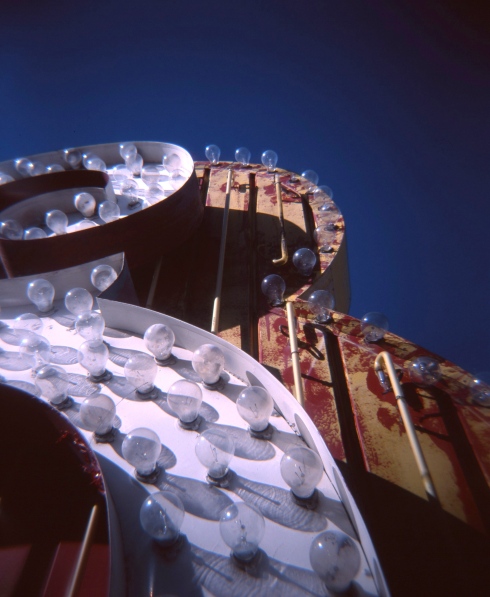
A tour of the Neon Museum in Las Vegas was the first reservation I booked when I found out my husband was taking me to Sin City for my birthday. Located off the strip, it’s home to many iconic neon and electric signs from Vegas’ sparkly past. The goal of the museum is to preserve these beautiful signs and tell the story of historic Vegas. In addition to the signs on their property, the Neon Museum has restored and placed a handful of vintage pieces throughout the downtown area.
I knew my Holga with Fuji slide film would be the perfect medium for capturing these relics and I was not disappointed.
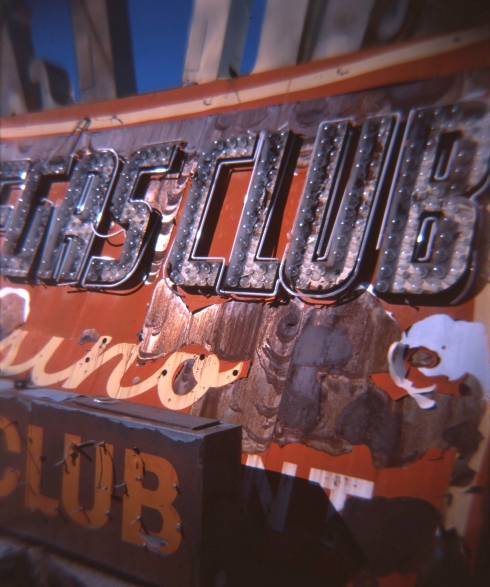
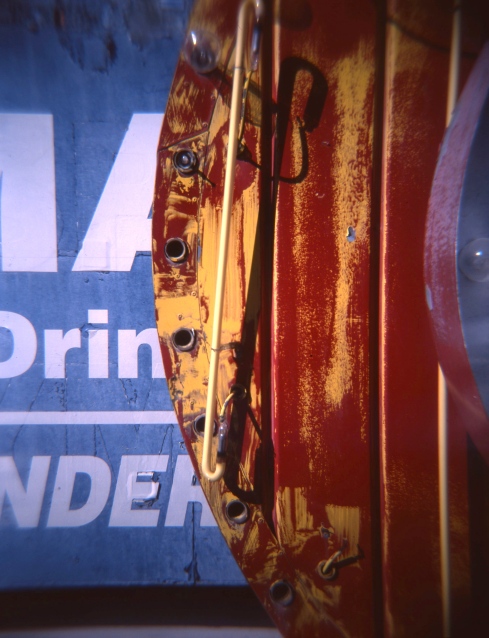
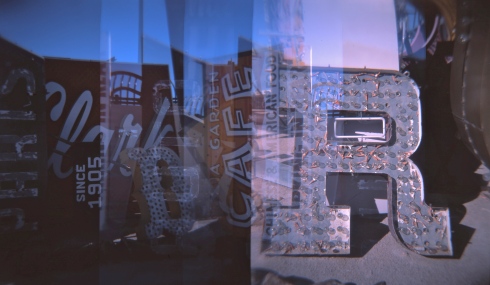
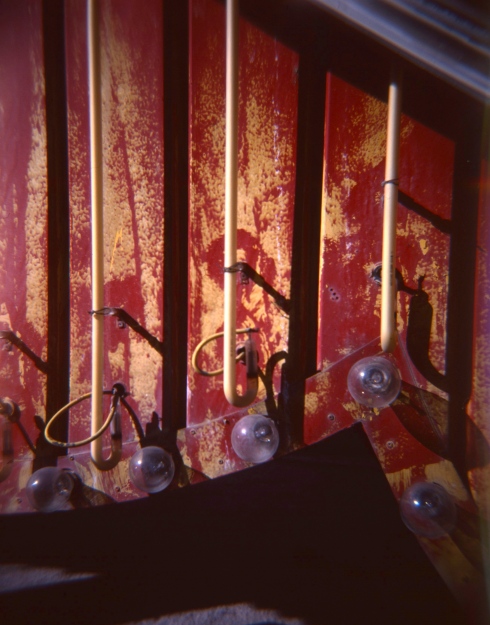
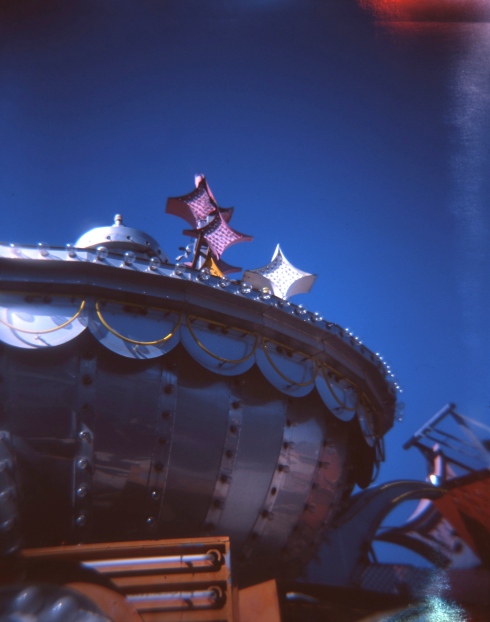
The beautiful vignetting and crisp center focus of the plastic lens provided all the drama I wanted. I should really call this post “A love letter to my Holga and Neon Signs” because I can’t imagine a more perfect combination of film and subject.
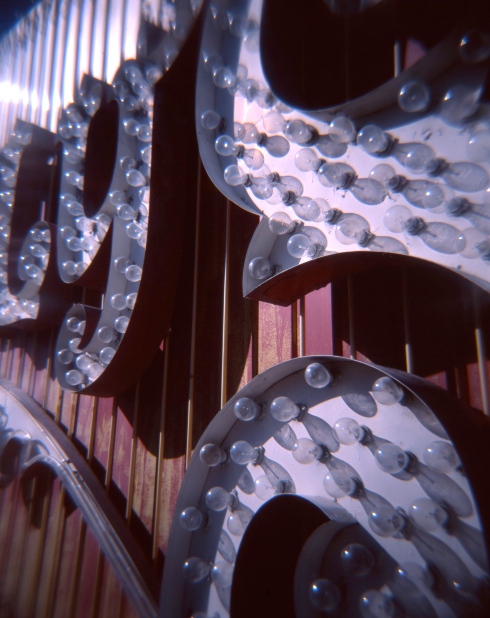
As our tour guide explained the rich and fascinating history of neon signs in Vegas, I and a few other photographers snapped away. I had my Holga, Fed 5 and iPhone while they sported fancy DSLRs. My husband was my patient and faithful assistant, holding empty spools as I furiously rewound my camera and reloaded film.
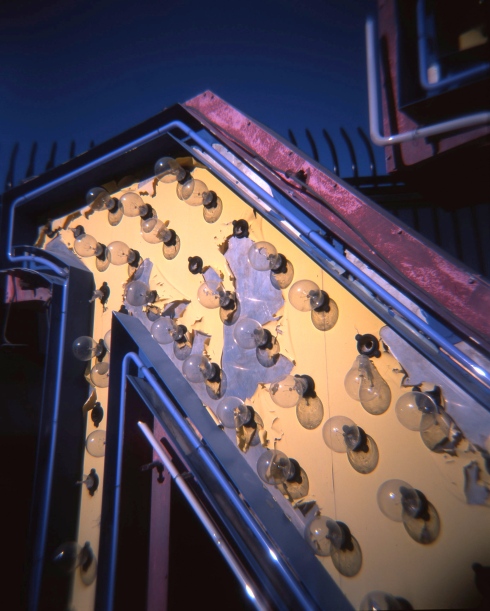
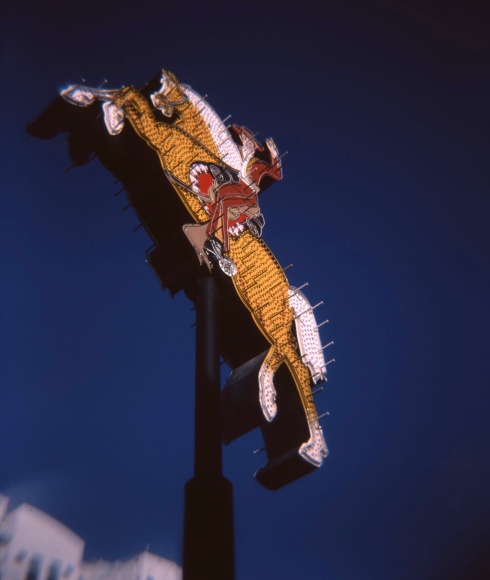
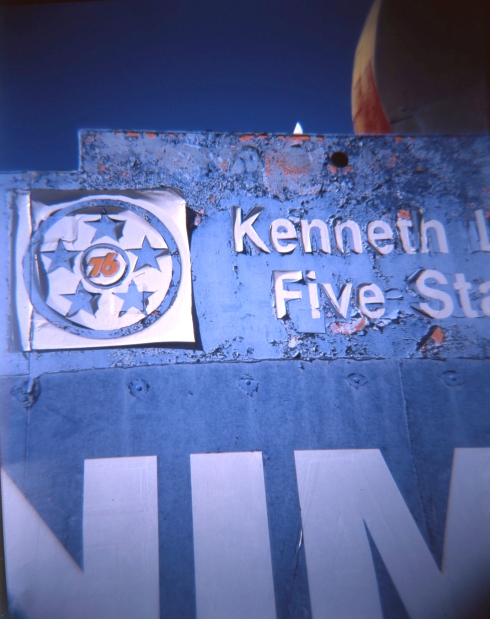
I also got some fantastic shots using my vintage Fed 5 and Lomography Tungsten film, but nothing compares to this roll. Holga, I love you!!!
If you’re ever in Las Vegas, the Neon Museum is a MUST SEE!! While you capture some fantastic pictures you’ll also be learning some history and helping this group preserve a dying art form.
1 Comment | tags: "Las Vegas", "Neon Museum", "neon signs", "slide film", analogue, callard, camera, cheap, fi, fidelity, film, history, Holga, ipdegirl, jenni, lightbulbs, lo, lo-fi, lomo, lomography, low, photo, photography, plastic, retro, vintage | posted in My Adventures
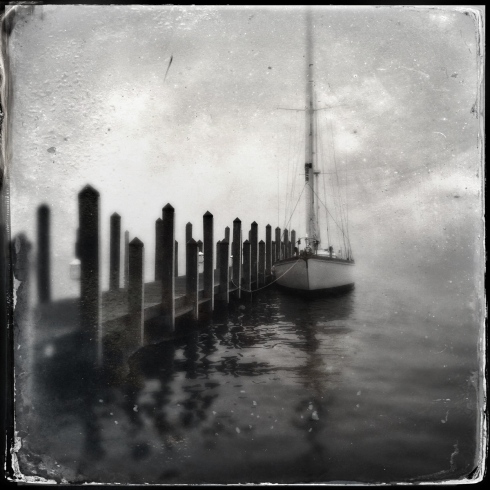
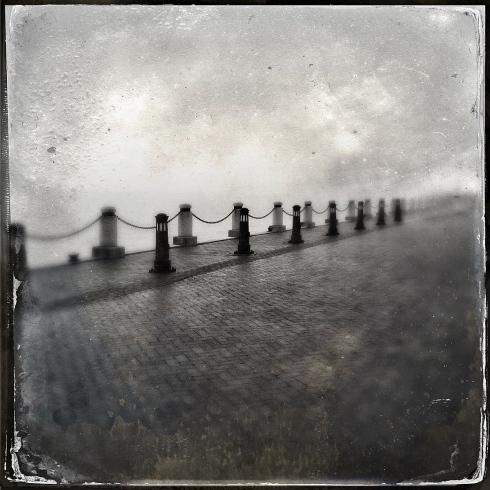
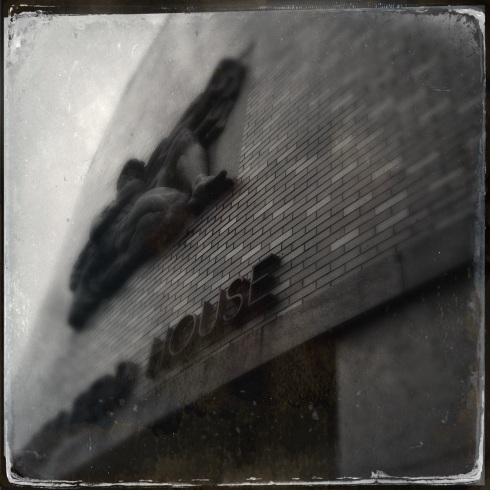
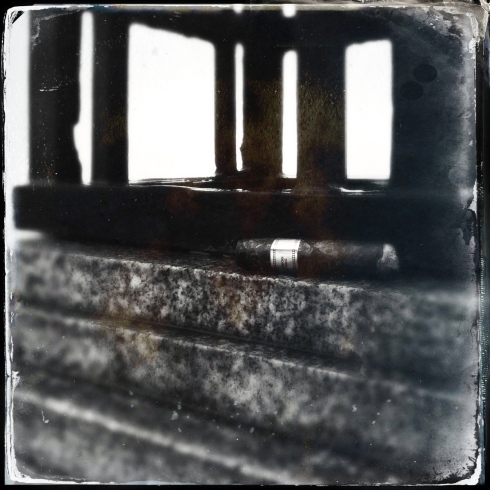
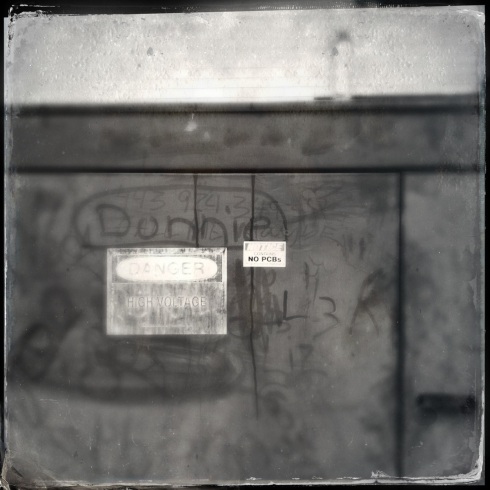
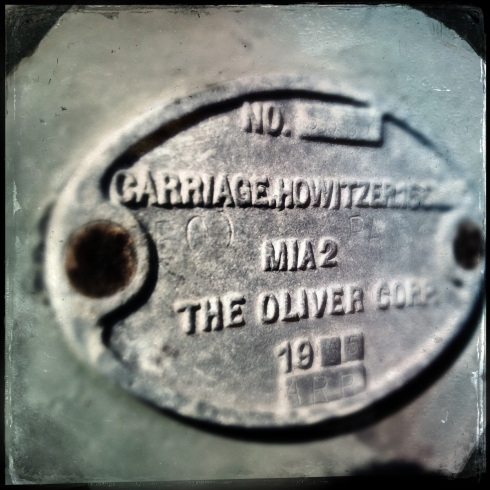
Hipstamatic’s new Tintype SnapPak has me feeling like I’ve taken a trip back to the early days of photography. It’s Tinto lens gives a selective focus that can be haunting and beautiful, especially when combined with either the D-Type or C-Type film filters.
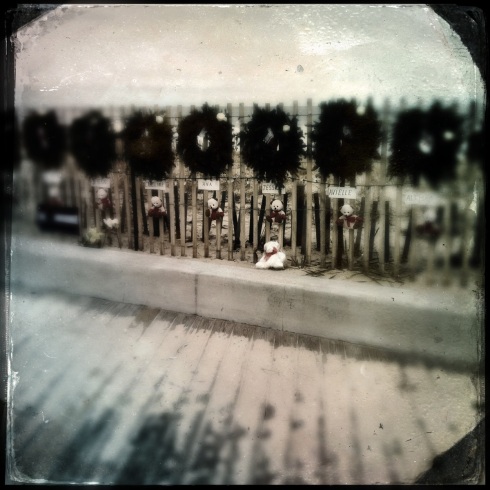
This newest pack gives your pictures the look of an old tin-type photo. It’s fun to see modern subjects juxtaposed with the antique format.
James M lens, C-Type Plate film
I used my favorite new combo one foggy day in Annapolis, MD and got some beautiful, moody shots around City Dock and the Naval Academy.
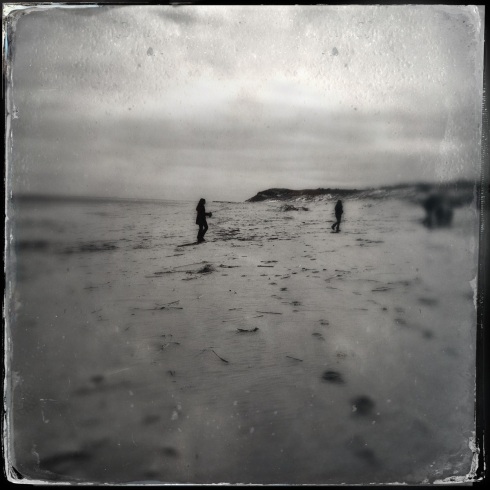
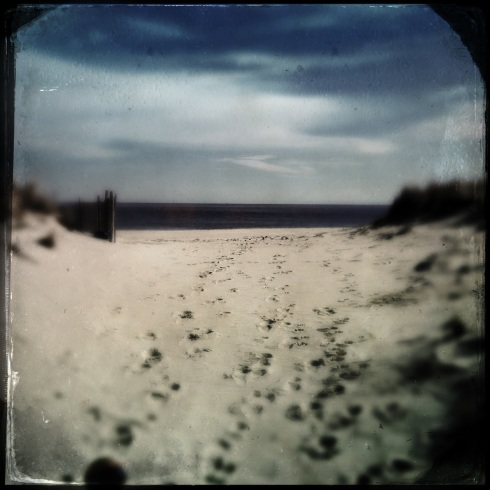
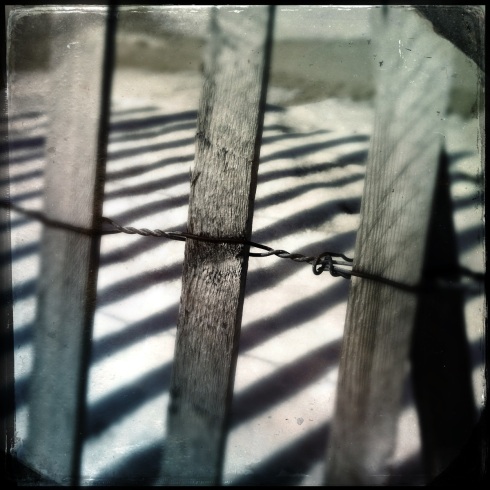
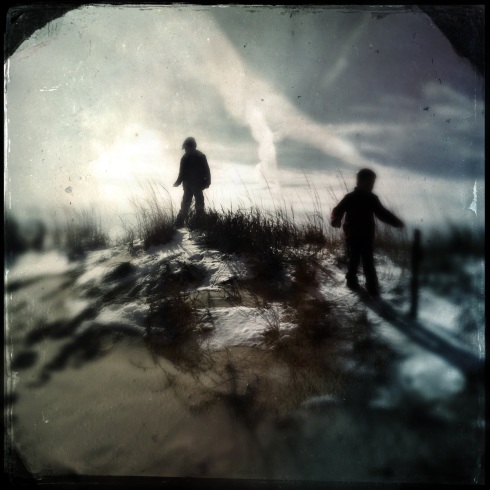
Today we took a cold walk on the beach at Cape Henlopen State Park. Here are some of those images.

Currently, I’m in the middle of editing some Revolog film pictures I took in Las Vegas, Nevada. I’m going to post them very soon. My spring semester starts in a few days and I’ll soon be back to studying and writing.
Leave a comment | tags: "Cape Henlopen State Park", Annapolis, Beach, C-Type Plate film, callard, city dock, D-Type Plate film, Delaware, fi, fidelity, foggy, Hipstamatic, ipdegirl, iPhone, iPhoneography, jenni, lo, lo-fi, lomo, lomography, MD, photo, photography, retro, review, sailboat, Tintype SnapPak, vintage | posted in App Reviews
I can’t begin to express how nice it is to write without the constraints of rules! Following APA format is exhausting and it really cramps my writing style, so I am happy to be blogging again.
It’s been very busy for me, as you can imagine. I’ve started graduate school…

Finished my first triathlon with a smile on my face…

…plus, I’ve been experimenting with my iPhone.
This week, I’ll share pictures from a recent kayaking trip. I’m fortunate enough to live less than five miles from the Atlantic Ocean, which means there are little creeks, bays and tributaries everywhere. To record our little adventure, I brought along an underwater camera and my iPhone.

The underwater camera shots were underwhelming, to say the least. There’s a stupid blue camera strap on the body and, try as I might, I could not keep it out of the pictures. Every last shot I took had the camera strap in it. Blech!!!! Next time I use that particular model of underwater cam, I am cutting off the strap.
So thank goodness I brought along my iPhone. Encased in a plastic bag, it survived the expedition and the captured some really beautiful pictures.

It was a bit of a challenge to compose pictures through a plastic bag. Composition was difficult because of glare from the sun. Drops of water near the camera lens distorted the image and made the camera lose it’s little computer-chip mind while it was trying to focus. To combat these issues, I wiped the bag and pulled it very taut over the lens. The plastic bag provided coverage and challenges, but it also gave soft, dreamy, Diana-like results. These pictures were all taken in Camera+ and edited in Snapseed.


That’s me in the hat. In order to get that shot I passed my iPhone to my husband using the paddle. It was quite a balancing act.

One of my favorite shots of the day is one I took of Jake and Elias. Someone with long legs (not me) figured out that hanging their feet over the sides was fun. My daughter Phoebe, pictured above, is blessed with long legs and said she could feel fish tickling her toes. We were all relaxing when I took this picture.

I had to straighten it out a little, but it really captures the mellowness of the moment.
I’ve also been using Snapseed’s Drama filter, especially for landscapes. Here are two beach shots I took as some rough weather was moving in.


More dramatic shots will be coming in another post, so until then….happy snapping!
1 Comment | tags: Atlantic, bag, callard, camera, Delaware, experimenting, fi, fidelity, ipdegirl, iPhone, iPhoneography, jenni, kayaking, lo, lo-fi, low, ocean, photography, plastic, postaweek2012, snapseed, Water, waterproof | posted in My Adventures
The more I use Instagram the more I am inspired to do crazy, wacked-out things. That’s the beauty of the immediate, streaming social photography movement. As a result, I’ve gone back to a few apps that I haven’t used in awhile, like Percolator, and am learning how to use them more effectively.

This is my friend Don’s drum, which he wrapped in a beautiful paisley fabric. I took it the other night as he and his band Sweet Leda were setting up for a gig. It’s a cool picture alone, but run through Percolator, it exudes a freaky, whimsical vibe befitting it’s looks. This shot of a bunch of colorful bracelets was also processed in Percolator. Again, the original was cool, but I love how the shapes are enhanced by the app.

It’s tough to sometimes capture a mood when taking pictures, especially if you’re a participant. Two weeks ago, I participated in a fundraiser put on by my local Cross Fit gym, called “Share the Pain” (and boy was I in pain the next few days). My friend Ally and I shared a WOD (Workout Of the Day) then, being the Cross Fit gym member, she had to do a second WOD. I got some shots of her preparing for her second workout, then added some TTV effects in TtV Camera, which I think give the shots a gritty, tough look.

Then there was this shot of Ally’s socks. No real post-processing needed for this shot!

HDR is another effect I’ve been using. It’s not appropriate for all subjects and, much like bokeh, can be easily overused, so I try to use it judiciously. For example, it’s completely ineffective to use it on metal objects. It may enhance the color or give it a weird look, but I really don’t think it’s worth using. HDR looks best to me in shots with lots of natural elements (trees, sky, water, people). That said, here are a few HDR shots from a recent night out at the Dirt Track races in Georgetown, DE.


While these are not my best HDR shots, I love how the inclusion of all levels of exposure brings out each individual person, along with details in the fence, bleachers and track.
The next two shots are collages I made with Frametastic. I was killing some time at work when this box of medicine vials caught my eye.

I liked the original, but took it up a notch in Frametastic.

The next collage was inspired by my fingernail polish. I took the kids to the boardwalk for an afternoon out and we all noticed how many things matched the color. I turned it into a photo game and this is the end result.

Here are a few random shots that I really like. They were processed in Camera+ and Vintique.


You never know what inspiration you’ll find when you look up. Here are two stand-outs.


These last two shots are macros of ordinary things. When it gets slow at work (which isn’t very often) I try to look around and get inspired, which can be tough at a hospital. Last night I just couldn’t find ANYTHING, until I started looking at my surroundings with a graphic, abstract frame of mind. Here’s a stack of stapled papers taken and processed in Camera+.

When I got home last night, I found tiny little pencils on the kitchen counter. My daughter Zoe had made them for her dolls to use by coloring toothpicks with markers. They were so realistic looking! This is how I captured them this morning with Camera+.

Kind of fitting considering it’s almost time for everyone to go back to school. Speaking of which, you’ll notice my posts have gotten a little sporadic. Unfortunately, that trend will probably continue as I go back to school next week to pursue a master’s degree in nursing. My family nurse practitioner program is a 3 1/2 year endeavor that will take a lot of my time and energy, which will leave me with less time to devote to my passions of photography and music. I will still be blogging but it may be on a less regular basis. Stick with me, though, because I’m never going to stop taking pictures. Thanks for your patience and understanding as well as all your feedback.
1 Comment | tags: "TtV camera", apps, callard, camera, Delaware, fi, fidelity, Frametastic, HDR, inspiration, Instagram, ipdegirl, iPhone, iPhoneography, jenni, lo, lo-fi, lomo, low, photo, photography, postaweek2012, ttv, Vintique | posted in Uncategorized
“I smell a Smena 8”: those were the first words I heard from Anton Orlov as he emerged from the darkroom of The Photo Palace bus. Yes, THE Photo Palace bus of Kickstarter fame. You’ll recall, Anton and his former partner in this photographic adventure were raising money to take the bus around the country, putting on workshops and spreading the word that analogue photography is NOT dead. The Kickstarter project did not raise enough money and Anton’s original partner Ryan Kalem moved on, but the Photo Palace bus is touring the country, nonetheless.

My family was visiting Salem, MA, just like we do every year, as part of our annual summer vacation to New England. After a great lunch at Salem Beer Works, we turned a corner near the Peabody Essex Museum (which is currently hosting an Ansel Adams exhibit) and spotted the familiar shape and color of a school bus. It took me two seconds to realize it was the Photo Palace Bus and another minute to actually believe I was seeing it in person. I broke away from my family and explained it was a bit of photo geekery that I had to experience for myself. Fortunately, my oldest daughter Phoebe was just as excited.

After spying my Smena 8, Anton explained it was one of the first cameras he’d owned. After showing him my other camera, the Olympus XA4, I had to get a photo with the man who was responsible for this mobile monument to photography. It’s not the most flattering picture of my mid-section, especially considering I’m training for a triathlon, but I was so excited!

Anton had travelled from Maine, where a witch told him he needed to come to Salem. Check out his blog post about his Salem experience and you’ll see what a great adventure he had. Our personal tour of Gilli began in the darkroom, located in the rear. Anton covered the back windows with a very well-designed fabric and wood contraption that allows him to display pictures through the windows as well as block out all the light. Here is his printing area.

Three metal trays sit in a large plastic sink, supplied with water from 75 gallon tanks mounted beneath it all. Next, he busted out some insane glasses that were a cross between bifocals and a jeweler’s loupe. These he uses when hand coloring his prints.

Anton’s two enlargers are opposite the sink.


There’s also a door on the back right side of the bus, which is a good thing because it was HOT in that little room. Back in the main part of the bus it was revealed that a sink and stove were hidden beneath a table displaying old cameras and prints.

Near this area is a cabinet that holds a few batteries. There are others beneath the bus. They can’t be stowed in the main are because, in Anton’s words “they leak hydrogen”.

A little transistor radio perched atop a beautiful wooden table supplied some background music. The tabletop came from a guitar manufacturing place and the little Polaroid radio runs on the battery pack from the film cartridge.

My unexpected discovery of the Photo Palace bus was one of the highlights of my vacation. It was a thrill to meet Anton and see what he’s done to Gilli. Lots of folks visited the bus while I was there and to see them get excited about Polaroids and old film cameras was really cool.


Many people from the Peabody Essex were there as well. One man was giving out cards advertising a project called “A Year of Photography”, in which you can participate via their website. It’s worth checking out.
Anton was so friendly and answered all my questions with enthusiasm. I’ll continue to follow his adventures and who knows? Maybe I’ll run into again in another part of the country.

1 Comment | tags: "The Photo Palace", analogue, antique, callard, camera, fi, fidelity, film, Gilli, ipdegirl, jenni, lo, lo-fi, lomo, lomography, low, MA, Peabody Essex Museum, photo, photography, postaweek2012, retro, Russian, Salem, tour, vintage, visit | posted in My Adventures
One of the staples of the Structure line of handmade films from Revolog, Lazer will give your pictures a touch of science fiction fabulosity, as if Darth Vader and Luke Skywalker were staging a light saber duel inside your camera. Dazzling green lines appear randomly throughout your roll of film. The effect is more subtle in over exposed shots and brighter in properly and under exposed frames.
Here’s the Lazer effect on an accidentally taken-in-my-photo-bag shot. I never intend to do this, but it’s fun to see the effects in their naked form (so to speak).

One of the first shots on this roll of film is also one of my favorites. Not only did I get a little light leaking, but I got a great green line. This roll was taken in my Smena 8.

I love the look of Lazer in my shots without people.


It’s not as nice through someone’s face, but it’s still interesting.


The first shots on this roll were taken at Playland, the amusement park on the Rehoboth Beach boardwalk. It’s one of my favorite places to take photos because it’s just so loud and colorful and crazy.


In this double exposure shot you can see a faint light green line on the right side.

This long exposure carousel shot also shows the green line on the right side of the photo.

Overall, I’m digging Lazer, although for shots of people, I’d prefer another roll of Revolog film, like Tesla or Volvox. With Lazer, you can go for an overall ironic look to your photographs, like taking shots of a Civil War Re-enactment with Lazer. Better yet would be to take pictures of a sword fight at a Renaissance Festival with Lazer. Now that would be something!
 Yes, that’s a bacon-wrapped beer bottle on the cover of that magazine


Leave a comment | tags: "revolog", "Smena 8", analogue, Beach, camera, Delaware, exposure, fi, fidelity, film, handmade, ipdegirl, jenni, Lazer, lo, lo-fi, lomo, lomography, low, philosophy, photo, photography, postaweek2012, Rehoboth, review | posted in I love this film!
Since I became an Instagram addict, I’ve been trying many, many new apps, filters and techniques. One of the things I’ve been having fun with is making collages with Frametastic, a free, straightforward, super user-friendly program.


Select from one of the 44 frames available (you get access to most frames, but if you want all access must pay a small fee) and tap on one of the frame sections. To restore the last project you were working on, click on the wheel at the top right.

Selecting a theme will place your work on a background based on six categories: wood, sports, wedding, beach vacation, museum or roses. Here’s an example of the sports theme.

To begin, tap on a section of the frame, then choose from one of the options. Once you’ve chosen your picture, tap on it again and you can choose to magnify it or apply effects. Frametastic’s magnification feature is extremely useful for fine tuning and doesn’t sacrifice clarity. I’ve found it to be one of the best aspects of this program. Here’s a shot of my original photo before and after magnification.


If you want to apply effects, you can choose from an array of filters, including black and white, retro and cinematic. To rotate your picture, click on the circular arrow.

To use the same photo in another frame, tap and hold the picture and choose copy. Go to the square that you want to add the picture, tap and hold, then choose paste.


Lets look at the icons at the bottom of the screen from left to right. The arrows inside the rectangle allow you to choose the format of your collage.

Clicking on the envelope allows you to share your photo. You can save to your phone, some popular social media sites, email or even snail mail, plus you can change the resolution from low to high.

The question mark in the middle will guide you through some of the basics of using Frametastic.
To adjust the borders between photos, choose the frame icon and use the slider to widen or narrow plus, change the color of the border as well.

Finally, click on the square within the circle icon on the bottom right of the screen and you can adjust the corners of your collage.

I really love this program. There are plenty of options to customize your collage without sacrificing quality. A customized frame option would be the only thing I can think of that would improve upon Frametastic but, like I said, there are 44 options to choose from. At the low price of free, Frametastic is a worthy addition to your iPhoneography tool box.


Leave a comment | tags: app, callard, camera, collage, Delaware, fi, fidelity, Frametastic, ipdegirl, iPhone, iPhoneography, jenni, lo, lo-fi, low, mosaic, philosophy, photo, photography, postaweek2012, review | posted in App Reviews
Revolog’s Kolor film adds rainbow hues to your pictures, giving them an extra dimension of beauty.


I love how the color shading turns an otherwise hum-drum picture into a thing of beauty. Kolor comes in 36 exposure rolls (love!!). Each frame’s coloring will be slightly different with hues in all shades of the rainbow. These shots, taken at a minor league baseball game, just happened to be shaded green, which really accentuated the color of the seats and field.


Unfortunately, Rite Aid didn’t do a very good job with this film. There were tiny little dots all over the negatives. At first, I thought my scanner was just incredibly dusty, but I think it’s little droplets of residue.


According to their website, the color shading will be more intense in areas of under exposure, making this the perfect film for toy cameras or any other fixed-aperture camera in which under exposure can be easily achieved.


This roll was taken in my Olympus XA4, so I had full control of aperture and shutter speed. Next time, it’s going into my Vivtar UWS or La Sardina.


Once again, I’m thrilled with Revolog’s handmade films. They may be expensive, but they’re worth it. Turning drab memories into a technicolor dream, Kolor can make your film look like it was taken in a leaky camera or cross-processed, all on the same roll. What other tool in your analogue arsenal can claim that statement?


Leave a comment | tags: analogue, callard, camera, cheap, Delaware, fi, fidelity, film, ipdegirl, jenni, lo, lo-fi, lomo, lomography, low, photo, photography, plastic, postaweek2012, review, Revolog Kolor, toy | posted in I love this film!
In April, Team Will Run For Beer conquered the second annual Mud Run in Milton, Delaware and I was there, not only as part of the team but also as the official team photographer. I took my cheap underwater camera with me to document as much of the shenanigans as possible.  It was no easy feat running with my silly little camera, but none of my friends were surprised that I decided to bring one of my “crazy cameras”. Here are a few pre-race shots.

This ultra light kept buzzing the pre-race crowd

 Leah ran the kids Mud Run. Her sister Ella probably thought she was a little crazy.
 Another team of kid runners
I was really talking up the Mud Run this year at work, telling everyone how much fun we had last year. There are lots runners in Delaware, so I didn’t have any problem recruiting people. Here are some shots of the suckers who decided to run this year.
 Ashley, on the right in the green shirt, ran with our team. She does Zumba but doesn’t run (poor girl). Kathy is on the left.
 Gene runs and does sprint triathlons, so he was “in it to win it”. I told him we were “in it to finish it…for the beer”
 Pam and Lisa ran as “The Skidmarks”.Pam (on the left) even got her two nephews to run the race, too.
As you can imagine, a mud run can make you pretty messy. Here’s a shot of our shoes before the run.

Before we started the race, we decided a show of team solidarity was in order. We stacked hands and on the count of three, yelled “Beer”!

After that, it was off to the first obstacle, a large, muddy hill.

The woods hid some messy obstacles. We dodged low-hanging tree branches and waded through sometimes thigh-deep water. There were also some mucky spots where a few shoes were lost. We slogged our way through with smiles on our faces and thoughts of the post-race celebration in our minds.


Once out of the woods we had to climb over and through lots of things, including hay bales, tires, large drainage ditch tubes and a maze. There were a few spots where we had to wait in line, so I was able to get some more crazy shots. This one is of me and my husband. We’re not terribly messy, so it must be pretty early on in the race.


After this series of ditches, I had to put the camera down until the finish line. It was just too damn hard doing an army crawl through muddy pudding with a camera strapped to my hand. Fast-forward to the finish line!


Even Ashley finished the race. I wasn’t sure my little Zumba friend was going to do it, but she’s a trooper. Jake met her with a can of beer. He was the brewski ambassador, handing out a brew to friends who looked like they were in need, like our friend Russ, in this shot.

We had a blast at the mud run and while it was fun getting stupid shots this year, I don’t think I’ll be running with the camera next year. Go Beer!
Leave a comment | tags: "mud run", analogue, callard, camera, cheap, Delaware, exercise, fi, fidelity, film, fun, ipdegirl, jenni, lo, lo-fi, lomo, lomography, low, Milton, photo, photography, postaweek2012, running, toy, underwater | posted in My Adventures
With over 300 filters and endless ways to combine them, Filtermania 2 is a great way to expand your creative boundaries.
 Agave plant macro photo edited in Filtermania 2
Dropico Media’s latest update of its Filtermania app includes 20 categories of filters, from Classic, Frames, Nature, Destruction and Famous Places, just to name a few. One of the best things about this update is the ability to change the opacity and luminosity of each filter. Other highlights include
– Over 300 Photo Filters + New Filters Added
– Layer Filter-on-Filter for Unique Creations
– Rotate, Move, and Scale Photos
– History Feature: Move Back and Forth Through Your Work
– Share to Twitter, Facebook, Tumblr, Instagram and Flickr, or Save to Your
Camera Roll
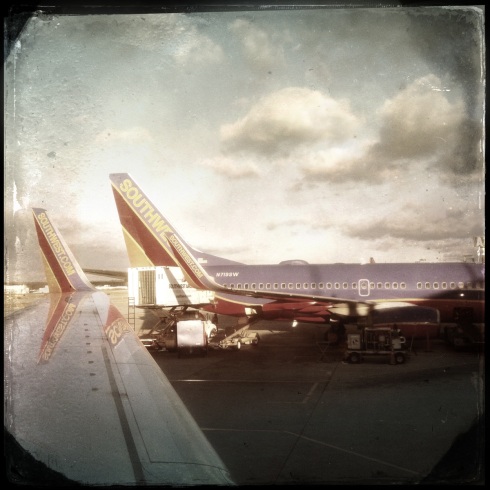
When I first started messing around with Filtermania 2, I only used one filter at a time to create vintage looking photos. Here are a couple that I took with Hipstamatic then edited in Filtermania 2.
 Sailboats in Hipstamatic, edited in Filtermania 2
 Dog Paw in Hipstamatic, edited in Filtermania 2
Then, I decided to just use the native camera and goof around. I took some macro shots of flowers and gave them a Filtermania 2 treatment

After getting lost on Instagram and seeing all of the wildly creative things others are doing, I got inspired. My son’s toy soldiers were sitting on the kitchen countertop. By layering a couple of filters, they were transported to otherworldly war zones.


I’m having a blast with Filtermania 2 and since it’s free (and so are all the filters), it’s a great time to download it and try it out.
Leave a comment | tags: app, callard, camera, Delaware, fi, fidelity, filter, Filtermania 2, Hipstamatic, ipdegirl, iPhone, lo, lo-fi, low, photo, photography, postaweek2012, review | posted in App Reviews


